In this Article
The P9 golf swing position is the follow-through checkpoint right before the finish. Here's what it should look like, the faults that wreck it, and the drills that fix it.
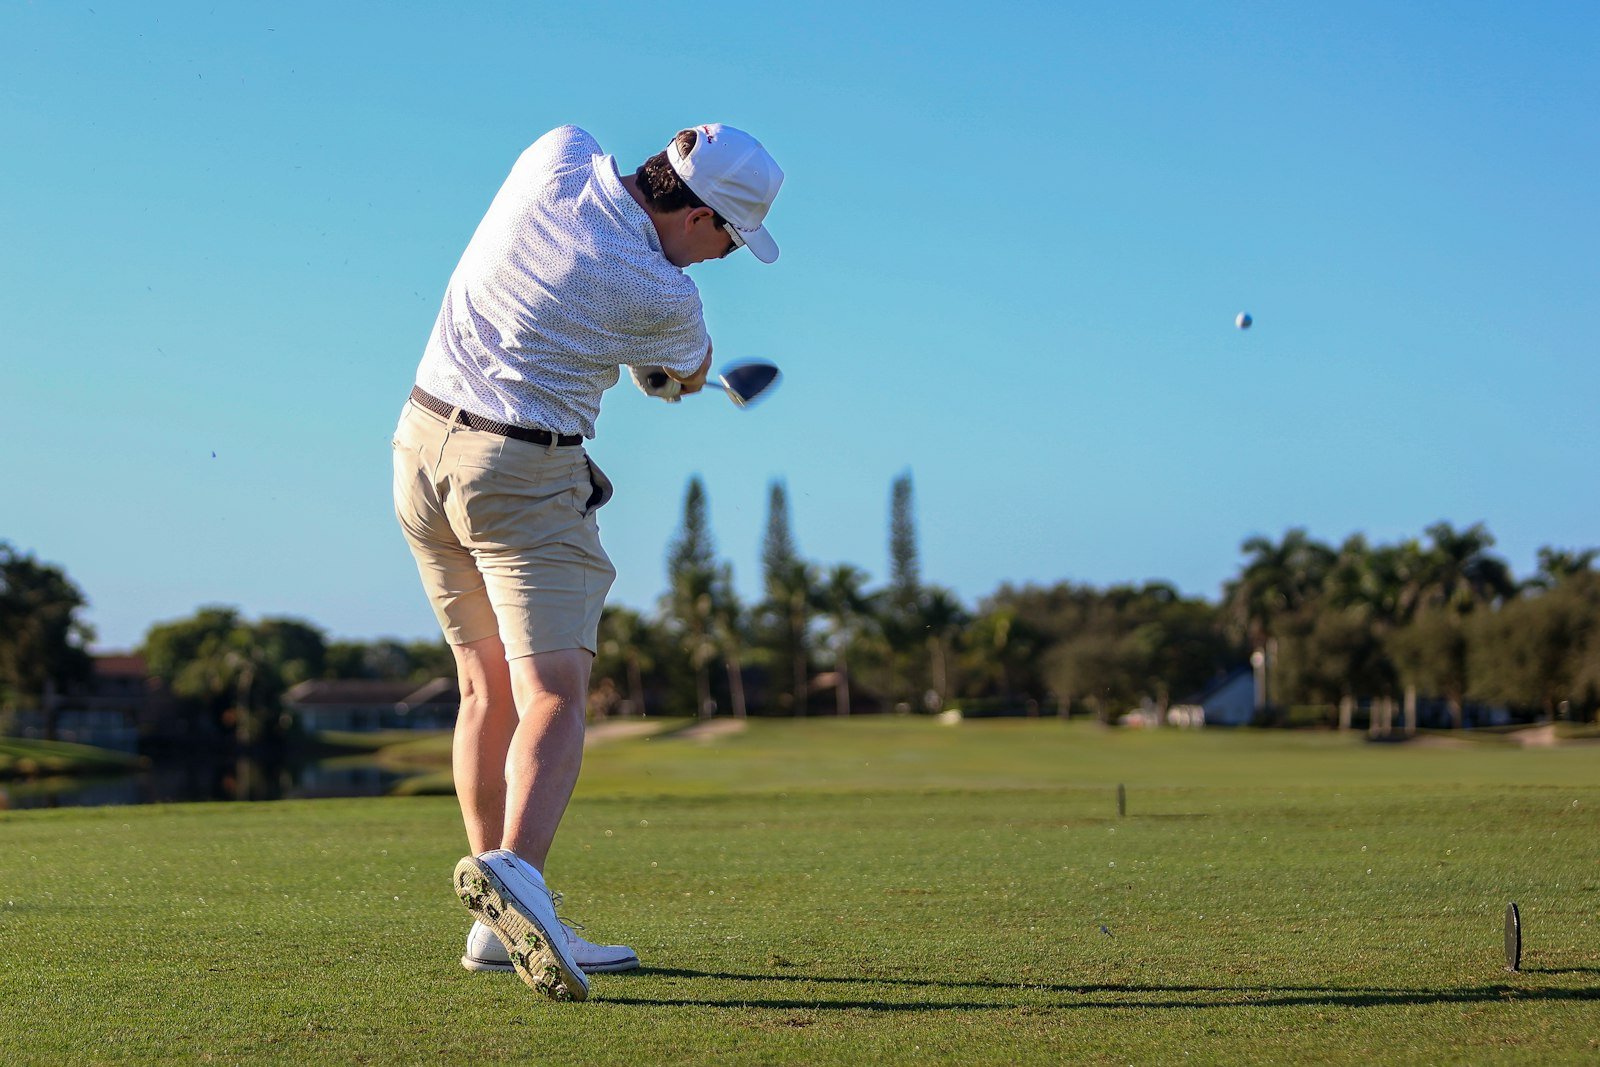
The P9 golf swing position is the checkpoint right after impact where your lead arm swings parallel to the ground on the follow-through, your body has rotated hard toward the target, and the club is about to travel up into the finish. It is the position most golfers have never heard of, even though a good one is the single clearest sign that everything before it – the downswing, impact, the release – actually worked.
I have been teaching golf in the Chicago area for seven years, and P9 is the position I point students to when they insist their swing “felt fine” but the ball says otherwise. You cannot consciously steer the club through impact – it happens too fast. But you can absolutely check where your body ends up a fraction of a second later, and that is exactly what the P9 golf swing position lets you do.
What Is the P9 Golf Swing Position?
P9 comes from the same ten-position “P-System” we have covered elsewhere on this site – the checkpoint framework that HackMotion’s guide to golf swing positions breaks down in detail, and that TPI-trained coaches and swing analysis software use every day. We have already walked through the setup at P1, the top of the backswing at P4, and the moment of truth at P7, impact. P9 sits two checkpoints past that, in the follow-through, right before the swing reaches its final resting spot at P10, the finish.
Here is where the P9 golf swing position sits in the sequence, and what happens immediately around it:
| Position | What it is |
|---|---|
| P7 | Impact – the club meets the ball |
| P8 | Release – arms extending, trail arm rotating over the lead arm |
| P9 | Lead arm parallel to the ground in the follow-through |
| P10 | The finish – fully rotated and balanced |
Think of P9 as a mirror image of P3, the point on the way back where your lead arm is parallel to the ground during the backswing. P9 is the same shape on the other side of the swing. If P3 shows you how the swing loaded up, P9 shows you how it unloaded – and the two should look like reflections of each other, not like two completely different motions.
What a Correct P9 Position Actually Looks Like
Strip away individual styles and the P9 golf swing position comes down to five checkable things. I run through these in almost exactly this order with students, because each one tends to expose a different part of the release.
- Lead arm parallel to the ground. Just like P3 on the way back, your lead arm should be roughly parallel to the ground, only now it is out in front of you on the target side instead of behind you.
- Lead elbow folded and tucked close to the body. It should not be pointing away from you or “flying.” A folded, connected elbow here is what keeps the club traveling on plane instead of getting thrown out and around.
- Chest and hips well past facing the target. By P9 your body should have kept rotating, not stalled out right after impact. If your chest is still facing partway right of the target (for a right-hander), the arms did the work instead of the body.
- Weight substantially on the lead foot. The transfer that started back at P7 should be nearly complete by now, with your trail heel starting to come up off the ground.
- Grip pressure still under control. Not white-knuckled, not loose enough that the club is sliding in your hands. See our guide to grip pressure points for what “controlled” should actually feel like.
Notice that none of this is about the clubhead. Amateurs tend to obsess over where the clubhead is pointing at any given moment; instructors care much more about the body, because the body’s position at P9 is what the clubhead is actually responding to.

How P9 Connects to P8 and P10
Your P9 golf swing position does not happen in isolation. It is the direct result of what happened one checkpoint earlier at P8, the release, where the arms extend and the trail arm starts rotating over the lead arm. A clean release at P8 – full extension, no early flip of the wrists – naturally produces a full, connected P9. A short-circuited release does not.
The same logic carries forward into P10, the finish. A golfer who reaches a strong P9 – lead arm parallel, body rotated, weight forward – almost always arrives at a balanced, held finish, because the hard work of rotating and transferring weight is already done. A golfer who arrives at P9 with a stalled body and a flying elbow usually ends up fighting for balance at P10, wobbling or stepping to catch themselves. If your finish looks rough, P9 is very often where the problem actually started.
Common Faults at the P9 Golf Swing Position
Here is where checking your P9 golf swing position earns its keep as a diagnostic tool, not just a pose to copy. Every common fault here points backward to a specific, fixable cause.
The Flying Trail Elbow
If your trail elbow is pointing up and away from your body at P9 instead of folding in naturally, the arms have disconnected from the body’s rotation. This is usually the same players who show a flying trail elbow at the top of the backswing too – it is a connection problem that shows up on both sides of the swing, not just one.
Rotation Stalls and the Arms Take Over
This is the single most common fault I see at this checkpoint. The body stops turning right around impact and the arms keep swinging on their own, which leaves the chest facing well short of the target at P9. It feels like you swung hard. What actually happened is that your body quit early and your hands had to do the finishing work by themselves.
Losing Grip Pressure Through the Release
Some golfers grip so tightly on the way down that their hands involuntarily loosen right through impact, and the club can be seen shifting or twisting in their fingers by P9. Others do the opposite – they were loose enough at address that they clamp down defensively coming into impact, which kills clubhead speed right when they need it most. Either way, grip pressure should stay close to constant from address through P9, not spike or collapse.
Carrying a Chicken Wing Into P9
A bent, pulled-back lead elbow right through impact does not just disappear by P9 – it usually carries forward into the follow-through as a visibly short, cramped-looking arm position instead of full extension. We cover the causes and fixes in detail in our guide to the chicken wing golf swing, but the short version is that it is almost always a symptom of the low point being in the wrong place at impact, not an arm strength problem.
Drills to Build a Better P9
You cannot think your way into a good P9 mid-swing – there simply is not time. These drills build the position away from full speed so it shows up automatically once you are back to swinging for real.
- Towel-under-the-lead-arm drill. Tuck a small towel or headcover under your lead arm and make slow swings through impact into the follow-through without dropping it. It fixes a flying trail elbow and a disconnected lead arm at the same time, because both faults make the towel fall almost immediately.
- Hold-at-P9 drill. Hit half-speed shots and stop the swing the instant your lead arm reaches parallel in the follow-through. Hold it for two full seconds and check your chest direction, your elbow, and your weight before continuing to a full finish.
- Feet-together drill. Hit balls with your feet touching. It is nearly impossible to keep your balance if your body stalls and your arms take over, so it forces the rotation that a good P9 depends on.
- Mirror check, no ball. Stand in front of a mirror or a window’s reflection and swing to P9 in slow motion. Checking your own position visually, rather than relying on feel, catches flaws that feel completely fine mid-swing.
- Video from both angles. Film down-the-line and face-on, then scrub frame by frame to the moment your lead arm hits parallel after impact. Compare it against the checkpoints above rather than guessing from feel.
Training aids that help with this (affiliate links): release training aids, impact bags, and a simple phone tripod for filming both angles.

Does the P9 Golf Swing Position Change by Club?
The shape stays the same, but the size of the motion changes. With a driver, the extra length and speed usually carry the lead arm well past parallel into a tall, full follow-through. With a wedge or a half swing, the same checkpoint exists but on a smaller scale – the lead arm still reaches roughly parallel, just sooner and with less overall body rotation.
What should not change from club to club is the quality of the position: a folded, connected lead elbow and a rotated body matter exactly as much on a pitching wedge as they do on a driver. Length is negotiable. Connection is not.

Frequently Asked Questions
What is the P9 golf swing position?
The P9 golf swing position is the ninth checkpoint in the ten-position P-System, occurring in the follow-through when the lead arm becomes parallel to the ground on the target side of the body. It mirrors P3, the equivalent position on the backswing.
How is P9 different from P8?
P8 comes immediately after impact, when the arms are extending and the trail arm is rotating over the lead arm. P9 comes slightly later, once the lead arm has swung all the way up to parallel with the ground. P8 is the release itself; P9 is where that release has carried the club to.
How is P9 different from P10?
P9 is a mid-follow-through checkpoint; P10 is the completed, balanced finish. Between P9 and P10, the body keeps rotating and the club continues traveling up and around until the swing comes to a full stop.
Why does my lead elbow fly out during my follow-through?
A flying lead elbow at P9 almost always means the arms have separated from the body’s rotation somewhere earlier in the swing. Practicing the towel-under-the-arm drill above, at half speed, is usually the fastest way to feel and fix the disconnect.
Can fixing my P9 position help with a slice?
Indirectly, yes. A stalled body at P9 is often the same stalled rotation that lets the clubface stay open through impact, which is one of the classic causes of a slice. Fixing the rotation problem tends to improve both checkpoints at once, since they share the same root cause.
Do I need to consciously think about reaching P9 during my swing?
No – and trying to will usually make things worse, since the follow-through happens far too fast to steer in real time. Build the position in slow-motion drills away from the course, then trust it to show up on its own once you are swinging at full speed.
Putting It Together
The P9 golf swing position is not a pose you manufacture for a good-looking photo. It is the honest midpoint between impact and the finish, and it tells you almost immediately whether your release actually worked: a folded, connected lead elbow, a body that kept rotating instead of stalling, and weight that has moved solidly onto your lead foot.
Next time you are on the range, do not wait until your finish to check your swing. Pause the video, or pause your slow-motion rep, right at P9 instead. If the checkpoints above hold up there, your finish and your ball flight will almost always take care of themselves. For general instruction background beyond the P-System itself, the PGA of America is a solid outside resource to cross-check what you are working on.