In this Article
Tuning your golf stance is crucial for consistency. This guide teaches you how to properly adjust your foot width, ball position, weight distribution and more for each club. Optimizing your address position aligns the clubface and enhances impact. Learn the setup tweaks that maximize your driving, iron play, chipping and putting.
A proper golf stance for each club in your bag is critical. From the driver to the putter, having the correct stance will help you strike the ball solidly and accurately. Though stances differ based on the club, there are key elements that form the foundation for proper technique with each one.
In this comprehensive guide, I will uncover the secret sauce to dialing in your setup no matter which stick you have in hand. A strong stance makes the rest of your swing possible. By adjusting your foot position, posture, ball placement, and more, you can align your body to swing each golf club effectively.
Throughout this article, I will break down the optimal stance for every club type. You will learn the unique alignments for your driver, woods, hybrids, irons, wedges, and putter. Adjusting elements like your stance width, ball position, weight distribution, and posture can have a dramatic impact on your performance. With my guidance, you will know exactly how to stand to different clubs to make solid contact time after time.
Proper setup position also allows you to utilize the specialized design of each golf club. Manufacturers carefully engineer modern equipment with features like perimeter weighting and low centers of gravity. But you have to align yourself correctly to take advantage of the forgiveness built into the club heads and shafts. My instructions will show you how to do just that.
In addition to detailing golf stances for each club, I will also cover how and when to make adjustments. Your stance should vary not only depending on which club you use but also on the type of shot you need to hit. Directions for shaping your trajectory, changing distance, and more will be provided.
By the end, you will understand the secret sauce that brings together all elements of a proper golf stance. Your improved alignment, ball-striking, and shot-making will lead to lower scores around the greens. So get ready to master your setup and watch your golf game reach new heights!
Table of Contents
Types of Stances for Different Clubs
When setting up over the golf ball, your stance should vary based on the club you are preparing to swing. The driver, fairway woods, hybrids, irons, wedges, and putter each require a unique alignment to hit the shot shape and trajectory you desire. In the following sections, I will break down the ideal stance for each club type in your bag. Master these fundamentals, and you will be in a perfect position to strike the ball true time after time.
Driver Stance
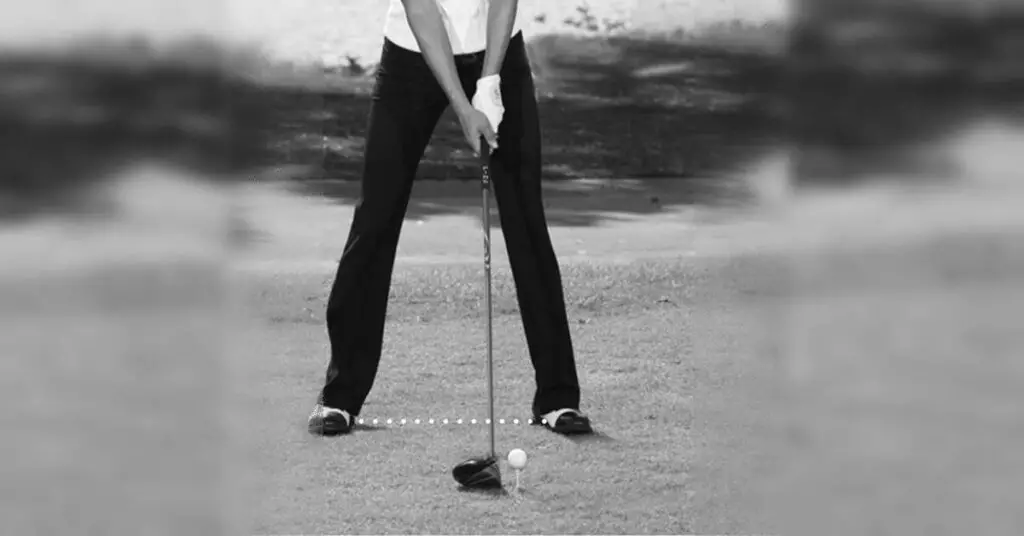
As the longest club with the largest, most forgiving head, your driver setup should promote power and distance. Here are the key elements of a proper driver stance:
- Feet Shoulder-Width Apart: Setting your feet about shoulder-width apart provides a stable base to coil back and swing aggressively through the ball. This wider stance can also help create a flatter backswing for optimal driver performance.
- Ball Opposite Left Heel: Positioning the ball opposite your left heel (for right-handed golfers) puts it in line with your left shoulder. This inside placement encourages sweeping across the ball on a downward angle for a higher launch.
- Weight Slightly on Back Foot: With your weight distributed about 60/40 towards your back foot, you can drive your weight forward during the downswing. Allowing your back hip to rotate behind the ball produces extra power.
By aligning yourself with these simple tweaks, you will gain the leverage, balance, and clearance required to deliver maximum clubhead speed. When teeing off, take your time setting up with a proper driver stance before attacking the ball.
Fairway Wood Stance
As you move down into your fairway woods like the 3-wood and 5-wood, adjust your stance for controlled distance. The ideal setup includes:
- Feet Slightly Narrower Than Driver Stance: Bring your feet in slightly closer together than your driver alignment. This stance around shoulder-width to a few inches narrower provides balance.
- Ball Positioned Middle of Stance: Move the ball up from your driver setup to sit aligned with the middle of your stance. This placement encourages solid contact after a sweeping downswing.
- Weight Balanced Between Feet: Keep your weight evenly distributed between your front and back foot instead of favoring one side. This balanced platform makes it easier to strike the ball cleanly.
With these tweaks from your driver position, you will have room to swing through the shot with optimal ground force. Fairway woods demand a controlled, sweeping impact rather than going for max distance.
Long Iron Stance
As irons decrease in length, your stance must continue to adapt. A proper setup for long irons like the 2-iron and 3-iron includes:
- Feet Narrower Than Fairway Wood Stance: Bring your feet closer together so they are below shoulder width. This narrower base keeps you balanced over the smaller clubhead.
- Ball Position Moves Forward in Stance: Inch the ball up towards the front of your stance in line with your front heel or armpit. This placement helps strike the ball before the ground.
- Weight Balanced or Slightly Forward: With your weight evenly split or slightly favoring your front foot, you can descend shallowly through impact for clean iron shots.
These adjustments from your fairway wood stance will have you striking crisp, accurate long irons. Dial in your ball position and narrower feet to achieve optimal iron performance.
Mid-Iron Stance
As you transition into mid irons like the 5-iron or 6-iron, the ball must move forward in your stance. A proper setup includes:
- Feet Narrow, Below Shoulders: Bring your feet directly below your shoulders with no space between them. This narrow stance keeps you balanced over the ball.
- Ball Middle to Front of Stance: Position the ball around the middle of your stance up towards your front armpit or heel. This placement sets impact before the low point in your swing.
- Weight Balanced or Slightly Forward: Distribute your weight evenly or slightly favor your front side. With balance or pressure shifted forward, you can sweep the ball at the proper angle.
With your feet together and the ball advancing, you will make crisp, solid contact with your mid-irons. This compact alignment will have you compressing iron shots beautifully off the turf.
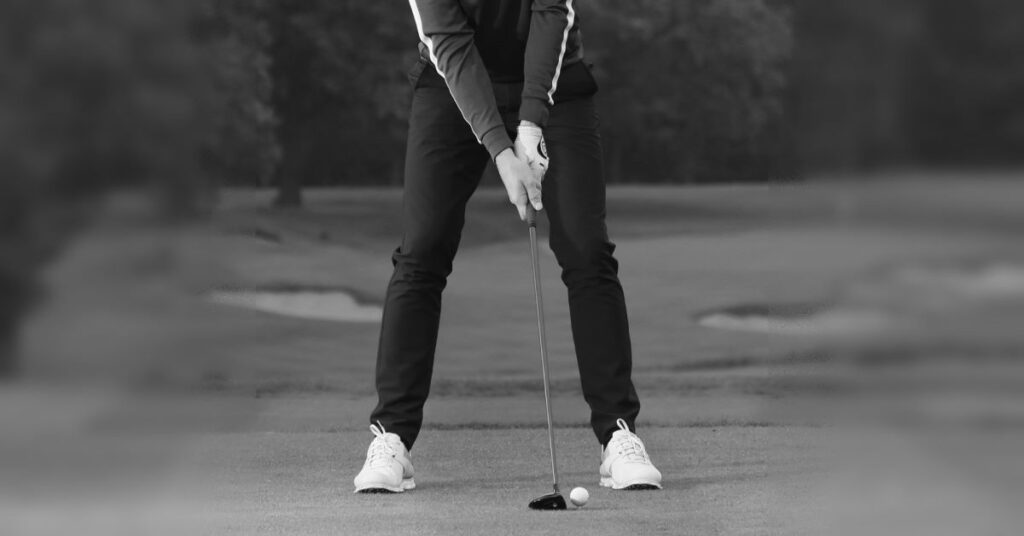
Short Iron/Wedge Stance
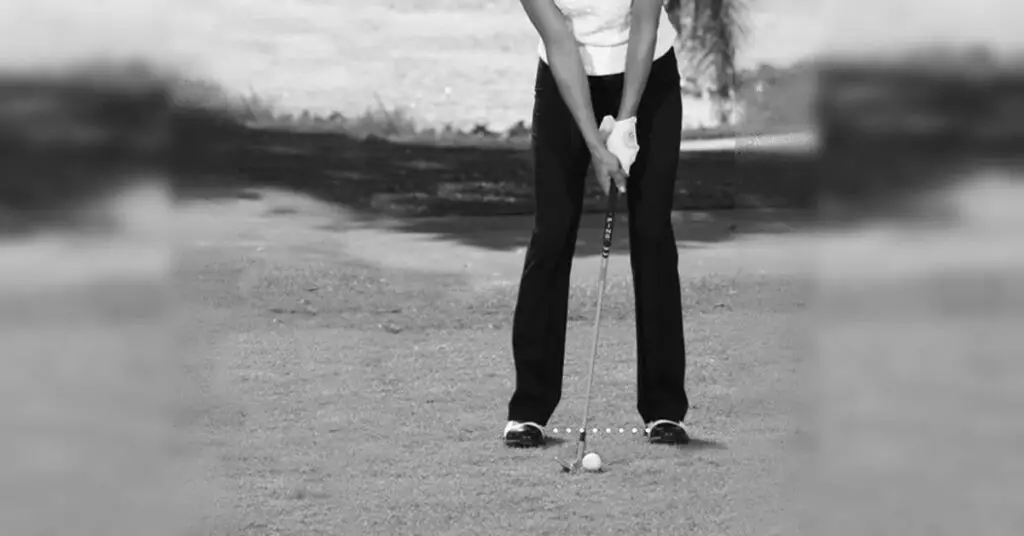
The shortest clubs in your bag require an extremely narrow stance and forward ball position. To correctly set up over shots within 100 yards, implement:
- Feet Together, Below Shoulders: Keeping your feet together and directly under your shoulders brings you as close to the ball as possible. This proximity provides control.
- Ball Positioned Forward in Stance: Play the ball from the front instep of your front foot up towards your belt buckle. This placement encourages the steeper angle of attack required.
- Weight Favoring Front Foot: Shift your weight so 55-60% is on your front side. With added pressure forward, you can strike down through the back of the ball.
With these wedge setup adjustments, you will begin striking crisp partial swings with precision distance and spin control. Make the stance changes needed for total mastery of short-range scoring shots.
Putting Stance
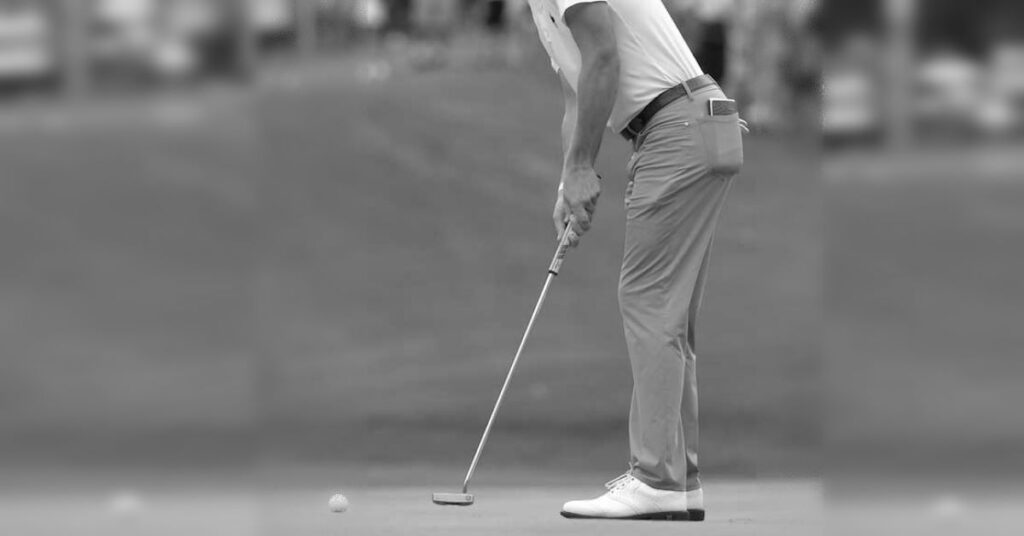
On the greens, stance, and alignment come down to comfort and feel rather than strict requirements. However, there are effective fundamentals to consider:
- Based on Personal Preference: Unlike full swings, there is no standardized putting stance. Find foot positioning that allows you to stroke the ball comfortably.
- Square, Legs Parallel Common: Many golfers opt for a square setup with their feet aligned perpendicular to the target line and hips parallel. This promotes straight-putting strokes.
- Shoulder Alignment Key: Regardless of exact foot position, ensure your shoulders are squared to your intended starting line to putt accurately.
- Weight Evenly Distributed: Strive for even weight on both feet. This balance reduces tension and makes a smooth pendulum stroke easier.
- Ball Position Variable: Ball position depends on your preferred stroke – from the center line to inside front foot is common. Find what works best for you.
Experiment to discover your own personalized putting stance. While fundamentals like posture and alignment still apply, finding the right feel and comfort level is crucial for the greens. Tweak elements like ball position until you dial in dependable setup consistency.
Key Elements of Proper Stance
Now that we have covered stance basics for each club type, let’s examine the key elements that go into an optimal setup position. Tweaking factors like your stance width, ball position, and weight distribution can make a significant difference in striking the ball flush and minimizing mishits.
Stance Width
One of the most important adjustments to make for different clubs is how wide or narrow you set your feet. Wider and narrower stances serve distinct purposes:
- Wider for Driver, Woods: As mentioned for the driver, a wider than shoulder-width stance creates leverage for power while keeping you balanced over the teed ball. The same applies to Fairway Woods.
- Narrower for Irons, Wedges: As shaft lengths decrease from woods to irons, gradually close your stance by bringing your feet together below shoulder width. This keeps you centered over the ball to compress irons.
- Directly Below Shoulders for Wedges: Opt for the narrowest possible stance with feet together and directly under your shoulders for total control over wedge shots.
Stance width has a direct impact on your swing plane. A wider stance promotes a flatter backswing and circular downswing ideal for woods off the tee. A very narrow stance allows an upright backswing and straight-plane downswing to shallow out irons from the turf.
Ball Position
The other crucial adjustment is ball position – how far forward or back you place the ball between your feet. This varies based on both the club type and desired ball flight:
- Driver – Inside Front Foot: The driver ball position up against your front foot gets you squarely behind it with driver length and encourages upward launch.
- Woods – Middle of Stance: Fairway Woods allows some downward strike, so move the ball back to the middle to sweep it cleanly.
- Irons – Middle to Front: Gradually move the ball up towards your front foot as you transition from long irons to short irons for a shallow angle of attack.
- Wedges – Forward in Stance: Situate the ball at the front instep or even off your front foot with wedges to strike down steeply for spin and stopping power.
Tee shots want a launch, iron shots need sweeping contact and wedge shots demand straight descension. Ball position is the leading way to control your angle of attack for each.
Weight Distribution
Proper distribution of your weight between your front and back foot is another essential component of stance. The goal is to keep your body aligned and centered while influencing ball flight. Follow these guidelines for weight based on club selection:
- Evenly Balanced for Most Clubs: When using mid to long irons and fairway woods, strive to evenly split your weight. This balanced platform makes it easier to strike the ball solidly on the sweet spot.
- Favor Back Foot with Driver, Woods: Shift your weight slightly backward so 55-60% is on your back foot at address. Coiling into your trailside on the backswing loads power, which can then be unleashed by driving your weight left on the downswing.
- Favor Front Foot with Short Irons, Wedges: With short irons and wedges, preset 60-65% of your weight on your front side. This added pressure encourages a steeper angle of attack to compress the ball.
Distributing your weight appropriately serves multiple purposes. First, it centers your body behind the golf ball to make square contact. Second, it influences trajectory by promoting either a sweeping strike or downward compression.
Here are a few more tips for dialing in proper weight distribution during setup:
- Don’t sway back or forward – weight should be static at address.
- Start with even weight, then make adjustments.
- Your front knee should be slightly flexed.
- Feel centered over the balls of your feet.
Check that you are not swaying off the ball before taking the club back. Then commit to your weight shift on the downswing for maximum power and consistency.
Posture
Posture ties everything together in your golf stance. With proper posture over the ball, you will have balance, mobility, and consistent ball-striking. Here are the vital aspects of posture to focus on:
- Straight Spine, Relaxed Shoulders: Start by standing tall with your spine straight and your shoulders relaxed. Avoid rounding your upper back or hunching over – this reduces your mobility.
- Knees Slightly Flexed: Allow your knees to flex just slightly for an athletic stance. This unlocks the powerful leg drive needed to swing the club. Locked knees prevent rotation.
- Chin Tucked In Towards Chest: Position your head with your chin tucked in gently towards your chest. Looking down too steeply or having your chin jutted out leads to swaying.
Proper spinal alignment, knee flex, and neck position get your body poised for an efficient, balanced swing. From there, dial in the following posture keys:
- Soften your grip pressure to remove tension from your arms and shoulders.
- Set your feet, then waggle to find your natural athletic posture.
- Feel centered over the balls of your feet as you settle in.
- Let your arms hang vertically to align your upper body.
- Rotate your torso away from the target to coil fully.
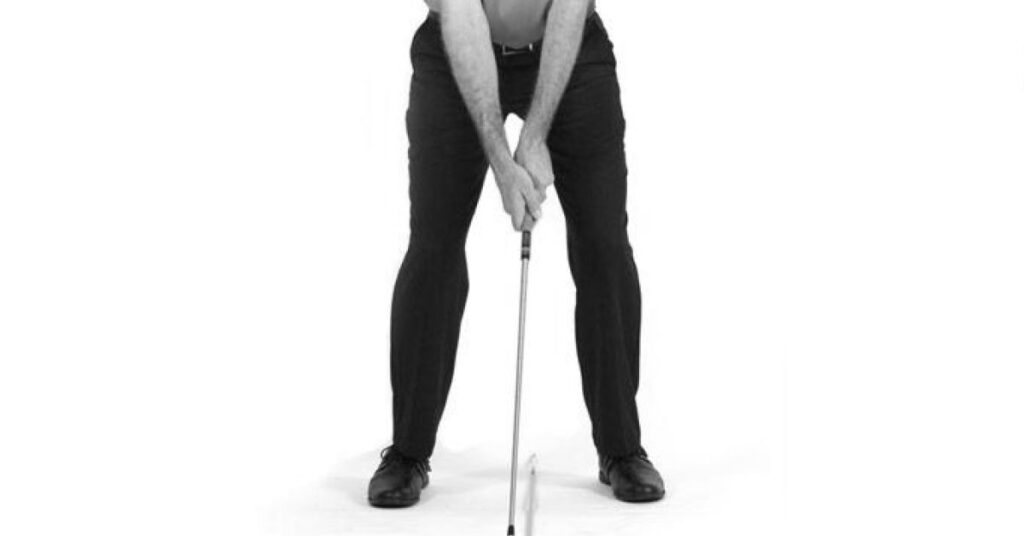
Proper positioning of your hands on the club is vital – experiment with different grip styles like interlocking or overlapping to find what works best.
With practice, an athletic yet relaxed posture will become second nature. But always take a few extra seconds after each shot to reset with proper posture.
The posture fundamentals remain the same regardless of club selection. However, you may need to adjust aspects like knee flex for different stance widths. For example, more knee bending allows you to lower yourself closer to the ball as the stance width narrows.
Alignment
Proper alignment completes your setup position by getting your body aimed correctly relative to the target. If your feet, hips, and shoulders are misaligned, you will likely push or pull shots left or right of your starting line.
Here are the alignment basics to prioritize before every shot:
- Feet Parallel to Target Line: First, align your feet perpendicular to where you want the ball to start. Point your toes directly at the target. For most shots, keeping your feet parallel is ideal.
- Hips Parallel to Target Line: Your hips should mirror the alignment of your feet – square and parallel to the target line. Avoid letting your hips be open or closed at address.
- Shoulders Parallel to Target Line: Complete your aligned stance by ensuring your shoulder line matches your feet and hips. Rotate your upper body so your shoulders are horizontal to the target.
Setting up with parallel foot, hip, and shoulder alignment perpendicular to your starting line dials in proper aim. This prevents the clubface from being open or closed relative to your swing path.
To dial in alignment consistency:
- Take your stance first without a club, ensuring parallel alignment.
- After gripping the club, reset your aligned feet, hips, and shoulders.
- Pick intermediate targets in your line to stand over the ball correctly.
- On straight shots, align the clubface directly at the target before swinging.
- For shaped shots, adjust your alignment to start the ball on the desired curvature.
- Check the alignment by holding your club vertically against your toes, knees, and shoulders.
With practice, you will be able to stick to your pre-shot routine and set up aligned every time. Proper alignment is crucial regardless of which club you are preparing to hit. Taking those extra seconds will prevent wasted strokes.
Adjusting Your Stance
Based on Club Being Used
While I have covered the ideal stance for each golf club type, you will also need to tweak your alignment based on the specific club in hand. Subtle changes in stance width, ball position, and weight distribution can optimize your setup for a 7-iron vs. 6-iron, for example.
Here are the key adjustments to make relative to club length and loft:
- Widen Stance for Driver vs. Irons: Your driver and fairway wood stance should be wider than your iron stance. As you go down in loft and shaft length, gradually narrow your stance from shoulder-width towards feet together below shoulders.
- Move Ball Back or Forward: In general, the ball moves back in your stance as club length increases from wedges up through the woods. But also adjust ball position based on the loft difference between a 5-iron and 4-iron, for example.
- Weight Shifts Forward or Back: You may opt to tweak your weight distribution depending on the exact iron or wedge you are hitting. Favor your front side slightly more with an 8-iron vs. 7-iron for a steeper descent.
Beyond clubs, think about fine-tuning your stance based on the specific shot shape and distance you need. Here are examples:
- Widen stance slightly for a 100-yard wedge vs. an 80-yard wedge.
- Play the ball back a bit further for a 150-yard 8-iron vs. 130-yard.
- Shift weight forward with a 75-yard sand wedge to prevent thin shots.
- Flare the front foot out more with a 190-yard 5-wood for a high draw.
While there are fundamentals for each club type, no two shots and situations are exactly the same. Learn to adjust your setup strategically by 1-2 inches for the exact yardage and shape required.
Based on the Type of Shot
The length and loft of the club itself are not the only factors that should influence your setup position. You also need to adjust your stance strategically based on the type of shot you intend to hit.
Purposefully altering elements like your alignment or ball position can shape your trajectory and dial in precise distances as needed.
Here are examples of tweaking your stance for different shot shapes:
- Open or Close Stance for Shaping: Flaring your front foot out opens up your stance for promoting a draw. Closing your stance with feet aiming left helps shape a fade.
- Move Ball Back for Higher Trajectory: Playing the ball an inch or two back adds loft and increases height for clearing obstacles. Works well for short irons.
- Lower Trajectory Ball Moves Forward: Advancing the ball a couple of inches results in a flatter angle of attack and more roll after landing. Helpful for long irons.
You can also fine-tune your stance to control the exact distance with short clubs:
- Widen stance slightly for full wedge swings.
- Narrow stance and play the ball forward to choke down.
- Open stance and lean shaft forward for higher pitch shots.
- Close stance and shaft back for low-flying chips.
Think through how you need to shape, control, or send the ball to its target. Then adjust alignment, ball position, and posture for that specific shot – don’t just default to your baseline stance.
With some practice at tweaking your setup 1-2 inches in various ways, you will gain tremendous finesse for landing your shots exactly where you visualize.
Swing Adjustments Based on Stance
Your setup position impacts more than just alignment and ball striking at impact. The width of your stance, ball position, weight distribution, and more also influence the path, plane, and power of your overall swing.
Here are key adjustments to make to your swing motion based on your stance:
- Wider Stance Shallows Swing Plane: A wide stance with feet flared allows a sweeping outside-in swing path ideal for drivers and woods. Let your arms stay wide on the backswing to shallow the club.
- Narrow Stance Steepens Swing Plane: With your feet together, swing the club more upright and around your body’s axis. This steeper plane is needed to compress irons with a downward angle of attack.
- Ball Position Influences Angle of Attack: Forward ball positions in your stance promote steeper downward blows with irons and wedges. Back positions help sweep the ball for launch with woods.
- Weight Shifts Add or Reduce Power: Allowing your weight to shift onto your back foot during backswing loads power potential through impact. Keeping weight forward reduces power for shorter shots.
Accommodate the adjustments above by turning your body appropriately on the backswing. For example, limit hip turns with a narrow stance to make room for an upright backswing. Or allow hips to rotate open more with a wide stance for a flatter shoulder turn.
Tune your swing motions to work synergistically with your aligned stance for ideal impact. Mastering how stance affects swing path, face angle, and club delivery is crucial for consistent ball striking.
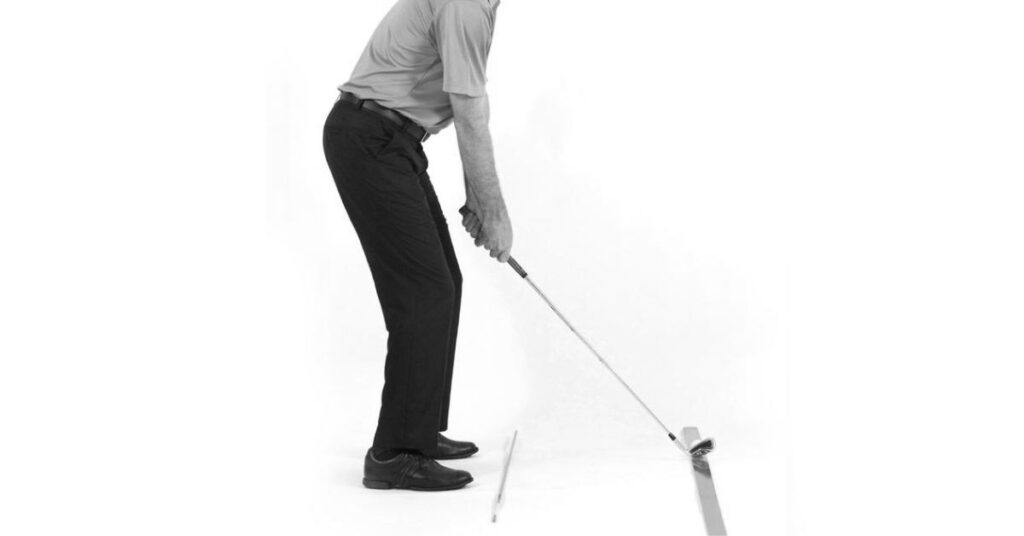
Proper Club Placement
A final but critical component of your setup position is the actual placement of the club itself behind the ball. Slight variations in where you situate the clubhead before taking your grip impact alignment and contact. Follow these placement guidelines:
- Driver Lined Up with Left Heel: Place your driver on the ground aligned with the instep of your front foot. This inside placement squares the clubface to your target line at address.
- Irons/Wedges Lined Up Center: Position your irons and wedges so the clubhead is centered between your stance width. Never play irons back in your stance – this reduces consistency.
- Putter Based on Preference: Some golfers line up their putter inside or even outside their front foot. Find face balance and placement that suits your stroke.
Proper club placement prevents the shaft from leaning forward or back at address. In turn, this allows you to deliver the clubface back to the ball squarely.
To check placement, take your grip and hold the club up vertically after aligning yourself. The shaft should hang straight up and down, not angled towards or away from you.
For shots requiring draws or fades, you can then adjust from neutral placement by:
- Situating the club inside your front heel for a closed face and draw bias.
- Situating the club outside your front toe for an open face and fade bias.
But start by mastering dead-hands vertical club placement for straight shots. Consistent delivery will remove one variable from your swing.
Take care to place the club properly every shot – don’t just approximate. Those extra seconds are an investment towards improving contact, distance control, and accuracy.
Achieving Proper Posture
While stance width, ball position, weight distribution, and more are important, it all starts with mastering proper posture over the golf ball. Your posture sets the foundation for powerful and balanced mechanics during the swing.
Focus on these posture keys:
- Knee Flex for Balance and Coiling: Allow your knees to flex moderately for an athletic look. Soft knees unlock the leg drive needed to coil on the backswing. Locked knees prevent turn and reduce power.
- Straight Back to Align Spine: Stand tall with your back straightened, not slouched or arched. This neutral spine angle maximizes rotation potential. Don’t just bend forward from the waist.
- Head Position Establishes Posture: Set your head in a chin-down, eyes-on-the-ball position without straining your neck. This poised posture maintains spine angle and balance.
Finding your ideal posture takes experimentation. Begin by standing upright and relaxing your arms, shoulders, and grip pressure. Then waggle to settle into a poised athletic stance. Let your knees flex naturally as you sway.
Check that your weight is centered over the balls of your feet, not your heels. Your arms should hang down from the shoulders. Rotate side to side to get accustomed to clearing your hips.
Use alignment aids like Clubs and Shafts to verify your posture is not crooked at address. Have a teaching pro observe your stance from face-on and down-the-line angles to diagnose issues.
Foot Position for Different Shots
We have covered stance width fundamentals. But you can also leverage your foot position – how your feet are oriented to each other – to shape shots and dial in distances.
Here are guidelines for foot flaring based on the shot you need to hit:
- Square Feet for Straight Shots: Keeping your feet aligned parallel with no flare produces straight ball flight on most full swings. This neutral foot position makes it easier to swing on plane.
- Open Stance to Aim Left: Flaring your front foot outward opens up your stance, aiming your body left. This closed clubface promotes left-to-right ball curvature.
- Closed Stance to Aim Right: Flaring your front foot inward closes your stance, aiming right. The resulting open-face shape facilitates right-to-left shot bending.
- Flare Feet Out for High Shots: Letting both feet splay outward lifts your body higher over the ball. This steeper angle of attack de-lofts the club for height.
You can also leverage foot position for finesse on short shots around the green:
- Widen stance and open front foot to hit higher lofted chips.
- Narrow stance and close front foot to keep pitch shots low.
- Aim feet left of the target for bump-and-run shots with draw spin.
- Aim feet right of target for low runners with fade.
Become adept at quickly flaring your feet inward or outward before settling into your stance. This added dimension of stance control will prove invaluable for maneuvering shots around trouble or hazards.
Conclusion
By now you should understand the ingredients that go into a proper golf stance for every club in your bag. While address positions vary based on the club, smart adjustments to your foot width, ball position, weight distribution and more can optimize your setup.
To recap, a wide stance promotes power for drivers and woods, while a narrow stance provides control over irons and wedges. The ball position should move back as club length increases from wedges up through fairway woods. Distribute your weight evenly for most shots, but shift slightly onto your front side for short clubs.
No matter the club, posture is critical for proper spinal alignment, balance, and rotational freedom. Stand tall with your weight centered, knees flexed, and head up for optimal mechanics. Always align your feet, hips, and shoulders parallel to your intended starting line as well.
Do not just default to one static stance. Making purposeful adjustments to your setup for each club is the secret sauce for flush strikes. An optimal stance aligns the face, enhances the shot shape you want, and takes advantage of modern club technology.
Beyond club-specific positions, also tweak your stance based on the exact distance or shot shape required. Elements like ball position, foot flare, and weight distribution can be fine-tuned to give you complete control over flight and curvature.
With an adaptable, disciplined setup routine, you will strip away variables and find consistency each time you step up to the ball. Mastering proper address positions will pay dividends for your ball-striking, accuracy, and scoring.
So commit to your setup, build a powerful foundation, and watch your techniques and results take shape from the ground up. By optimizing your stance for every club, you will play golf in total command of your game.